
This post is an extension of the larger post: An Asian Twist on a Traditional Holiday Meal.
My family never ate turkey for Thanksgiving.
We didn't even come close. Instead, without fail, every year we huddled around a warm, boiling pot of broth and enjoyed a traditional Chinese hot pot. It wasn't until I went to college and spent Thanksgiving at a friend's house that I had traditional turkey for the first time.
Bryan, on the other hand, ate turkey every year growing up. They did all the fixings - mashed potatoes, stuffing, cranberry sauce, sweet potatoes . . . His Chinese mother learned the tricks of the trade from an American host family back when they first moved to the U.S. three decades ago.
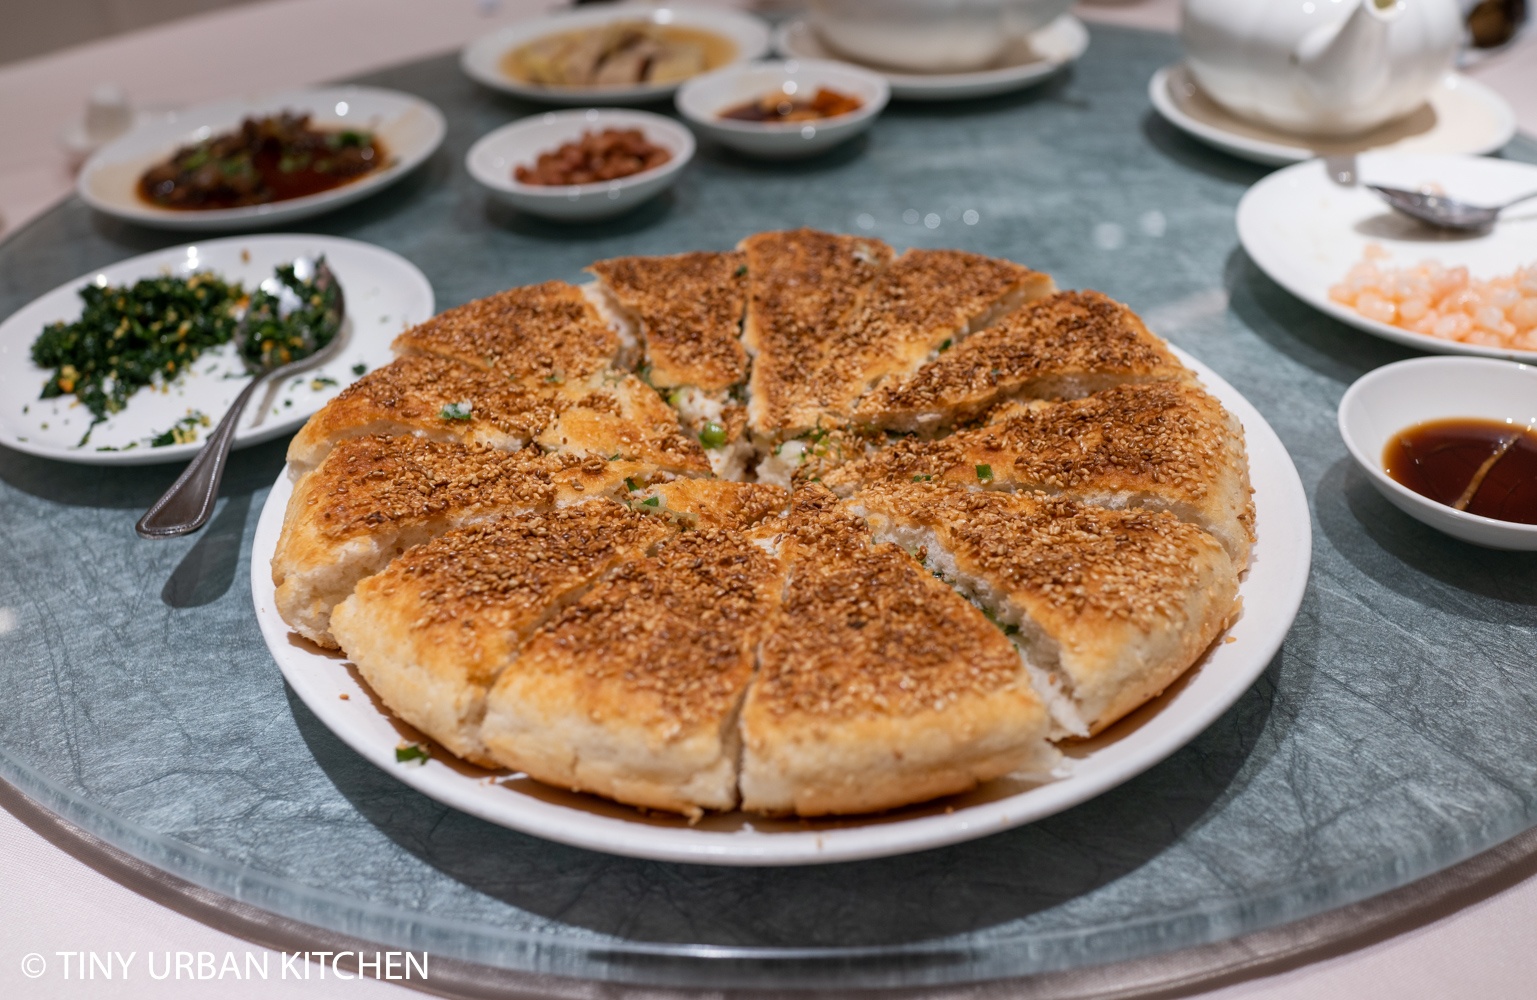
Just two years ago, I saw another "version" of Thanksgiving when we visited his aunt for the holiday. It was an interesting hybrid of our two cultures: the traditional turkey and bread-based stuffing turned into an oven roasted duck and sticky rice filling.
Inspired by that meal, I decided to try make my own Asian inspired oven-roasted duck for Thanksgiving this year.
I had never made duck before, so I did tons of research before settling on a method. My original idea was to try using our new Weber Summit grill's rotisserie function. Alas, Bryan was nervous about the fact that we'd never set it up before (he hates experimenting on guests), so we decided to save that for another day.
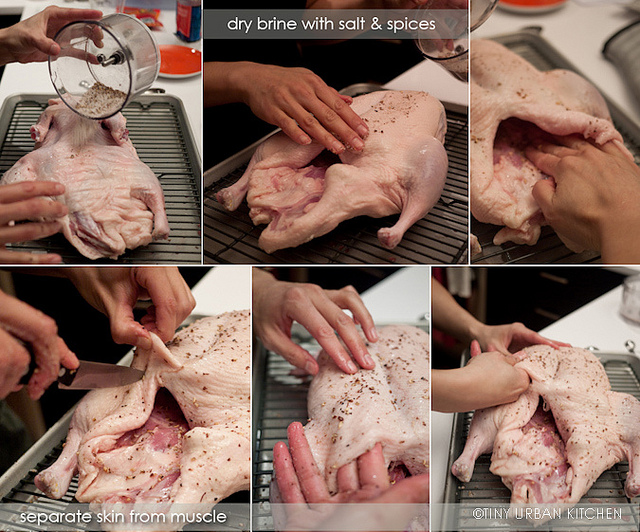
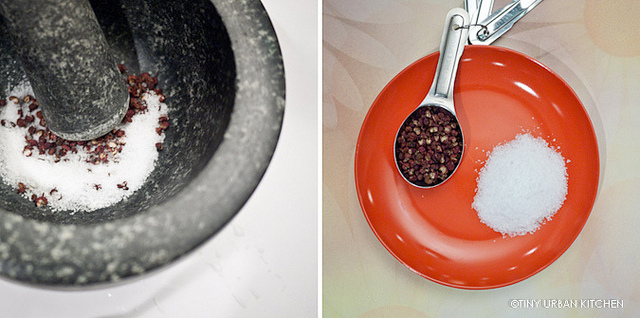
Start with a Liberty Pekin duck and generously dry-brine it with a mixture of salt, baking powder, and crushed fragrant Szechuan peppercorns (one of my favorite spices of all times). You can grind the spices together in a mortar and pestle, or use a food processor (much easier!).
You want to make sure both the outside and inside cavities are well covered. Using your fingers, separated the skin from the meat. The skin is tougher than you might initially think, so go ahead and get your hands in there to really separate it. At times I had to really tug at connective tissue to really separate the skin.
This extra step allows the fat to render more quickly while baking, which helps create a crispy skin. If possible, rub the salt/peppercorn mixture inside the cavity directly onto the meat. This will help flavor the meat a lot.
If you think your duck is particularly fatty, you can aid the fat rendering process even more by poking tiny holes in the skin (I've read recommendations that suggest poking every inch or so!). Make sure not to macerate the meat while you're at it.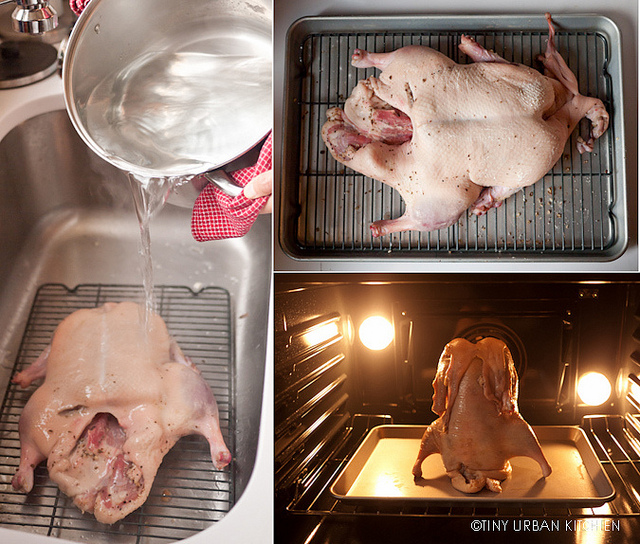
Let the duck dry overnight in the refrigerator, uncovered. If you have a roasting rack, you can use that. Otherwise, I just put it on a tray on top of a small baking rack.
Once you are ready to start baking, take out the dry bird. Bring about 4 quarts of water to a rolling boil and pour the hot water over the entire duck. This allows the stretched out skin to shrink and tighten back towards the bird. It happens pretty instantly right in front of your eyes.
Let the duck air dry for about 5 minutes. Fill a tall 16 oz beer can about half full of water. Place the duck's cavity over the can so that the duck is sort of "sitting" on the can. This allows the duck to bake evenly on all side. Brush surface of duck with soy/honey glaze. Bake at 350 °F, rotating every 30 minutes.
After about 1 hour, lower the temperature to about 250 °F and continue baking until most of the fat has rendered out (about 30 minutes?).
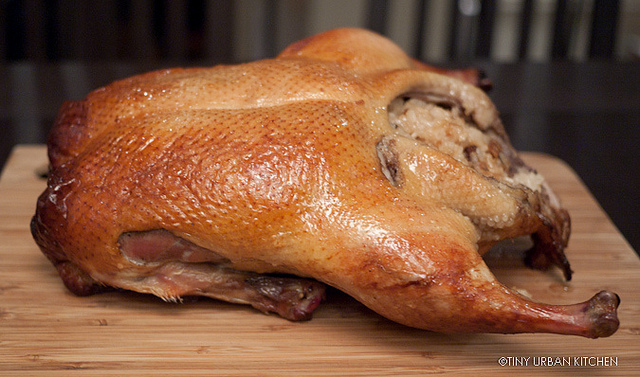
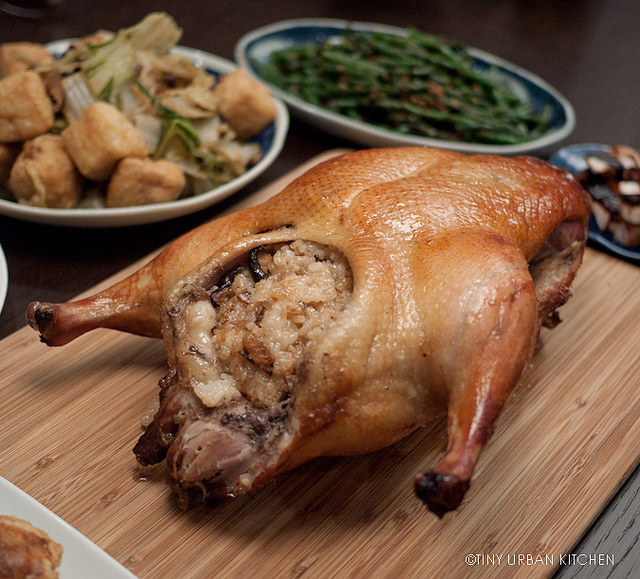
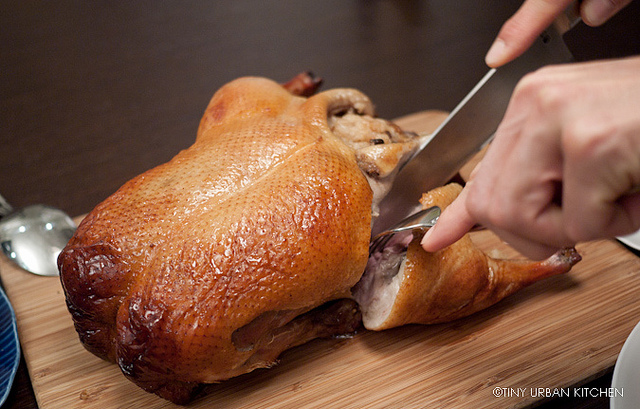
Let the duck rest for about 10 minutes before stuffing with Chinese sticky rice. Carve and serve!
This dish was a hit with the guests, who all commented on how moist and flavorful the meat was. I personally wished that the skin was crispier. I think the duck I got was particularly fatty, and therefore needed a lot more oven time before all the fat would be rendered. If I make this again, I would poke a ton of holes in the skin and let it render fat for a lot longer. I may also try increasing the baking temperature at the last 15 minutes or so, just to crisp up the skin.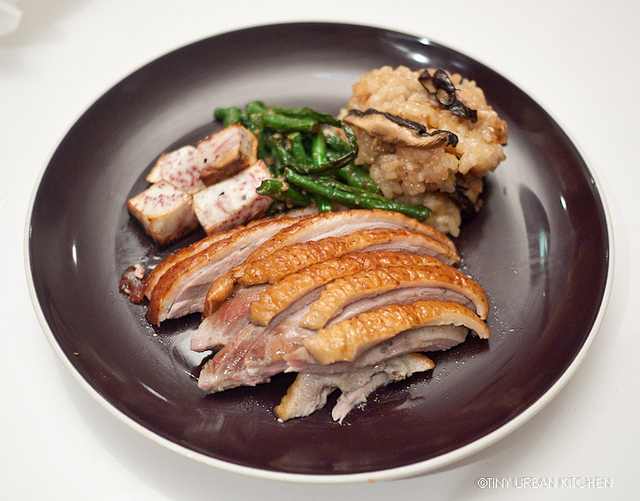
All in all, though, I would definitely call the meal a success. The dry-brining method is awesome - it adds a nice, deep flavor to the meat and also keeps it moist and tender.
If you've never had duck before, please keep in mind that a 5-6 pound duck has surprisingly less meat than you might think. It's probably enough to serve 2-3 people max, or maybe four people if you have a bunch of other dishes. Our party of 4 adults ate most of the duck, leaving just the carcass (which I used to make soup the next day!).
Chinese Oven Roasted Duck
Serves 4
adapted from J. Kenji Lopez-Alt at Serious Eats
Ingredients
1 tablespoon szechuan peppercorns (ground in mortar & pestle or with food processor)
2 tablespoons coarse kosher salt
2 teaspoon baking powder
1 tablespoon soy sauce
2 tablespoons honey
1 Pekin Long Island Duck (4-6 lbs)
Chinese sticky rice
1. Separate the skin from the meat by sliding your fingers in between the skin and the meat, starting at the bottom of the breast and moving your way up.
2. Rub the duck all over with the dry rub both inside and out. If possible, try to get under the skin. Set the duck on a wire rack on top of a roasting pan or baking sheet in the refrigerator and let sit overnight.
3. Bring about 4 quarts of water to a rolling boil and pour the hot water over the entire duck. Let the duck air dry for about 5 minutes.
4. Fill a tall 16 oz beer can about half full of water. Place the duck's cavity over the can so that the duck is sort of "sitting" on the can. Combine soy sauce with honey and brush the soy/honey glaze all over the duck.
5. Place the duck with the can on top of a baking sheet and bake at 350 °F, rotating every 30 minutes. After about 1 hour, lower the temperature to about 250 °F and continue baking until most of the fat has rendered out (about 30 minutes?).
Optionally increase the heat to 450 °F for about 15 minutes at the end to crisp up the skin. Note - I did not personally try this but my aunt recommended it, and I can attest that her duck is delicious
6. Gently remove the beer can (be careful of fluids that might come out of the cavity!) and stuff with Chinese sticky rice.
7. Carve and serve!
All Rights Reserved

[…] Download Image More @ http://www.tinyurbankitchen.com […]